Thursday, December 22, 2011

Bibble 5.2.3 Just Released

Hi Folks...

Well, it might have seemed a bit quiet around the forums and here in the blog, but that didn't mean we were slacking off.  Quite the contrary.  We've just posted the final version of Bibble 5.2.3  - and it includes a host of great improvements:

16 New Camera RAW formats
Some exciting new cameras have hit the shelves in the last couple months, and we're thrilled to be able to add support for so many of them.  I picked up a Olympus E-PM1 right when it came out - so of course we support it now :).  Many other mirrorless cameras are in our newly supported camera list - just take a look:

  • Olympus E-P3, E-PL3, E-PM1, XZ-1
  • Panasonic G3, GF1
  • Leica V-LUX 2, D-LUX 5
  • Nikon D5100, P7100, V1, J1
  • Sony A-77, A-65, NEX-5N
Interesting: only three of those have mirrors at all - and of those, two are translucent!

Mirrors or not, all cameras will appreciate out new RAW Noise control:


This may look like a simple, little tool, but it packs quite a punch.  The "Impulse" part does a great job at automatically finding dead or hot pixels and quickly corrects them.  These are seen most in higher ISO shots and long exposures (several second), but on one of my older cameras, there are a couple stuck pixels that are apparent even at ISO 100.  This control is on by default, so you likely won't even notice - expect those pesky hot spots will mysteriously vanish.  The 'RAW Noise' portion of the control and Threshold sliders work together to smooth out the worst of the noise before demosaicing. This gives tools like Noise Ninja a much better starting point, so these  two controls work great together.

We've also added a 'Blacks' slider - a handy and quick way to deepen the darkest portions of a photo, and we've added an 'Edit in External Editor' command to let you quickly 'round trip' in your favorite pixel editor.

We've fixed loads of bugs, improved stability, memory management, and removed a couple conditions that could cause the application to hang on single CPU computers.  

In otherwords, we've added quite a bit.

There is more big news to come in early 2012.  But for now, just enjoy the FREE upgrade to Bibble 5, and have yourself a mirrorless holiday season!

Cheers, Jeff

Tuesday, September 20, 2011

Custom Tool Tabs

The 5.2.3 release candidate that was just published contains a nice hidden feature that I and many other users have been missing for a long time: Custom tool tabs.

So why is this a hidden feature, shouldn't this be featured quite prominently?
Looks like our friends from the lab did not have the time to code a nice user
interface for it, therefore it is currently a bit of a hidden feature.

So instead of clicking around in a GUI, you have to hunt for the tool names you want to group together and list them in a text file in the order you want them to appear. The file that controls the tool grouping and order is customToolsUI.txt in your Bibble user folder (it does not exist by default, you have to create it yourself).
In this file you define the tabs and tools for each of them. Each line consists of two tab labels (one for regular and one for small fonts) and the user interface file of a tool or the name of a plug-in.

Not as easy as drag and drop in a GUI, but miles better than having to work with the hard coded tool grouping. I have been using this feature during the beta phase of 5.2.3 and it has already been a tremendous time saver.

So how does this work in real life? The file shown below creates the tool tab layout shown next to it (the screenshot shows the version for small fonts).


Std, Std, Presets.ui
Std, Std, Advanced/Curves.ui
Std, Std, BasicTools.ui
Std, Std, Advanced/Exposure.ui
S+N, SN, Advanced/Sharpen.ui
S+N, SN, Advanced/RAWNoise.ui
S+N, SN, Advanced/NoiseNinjaRegistered.ui
S+N, SN, sph.waveletsharpen
S+N, SN, sph.waveletdenoise
S+N, SN, com.kbarni.pixie
Color, C, Advanced/WhiteBalance.ui
Color, C, ColorBalance.ui
Color, C, com.seanmpuckett.brenda
Color, C, Advanced/ColorManagement.ui
Color, C, SelectiveColor/SelectiveColorWidget.ui
Andrea, Andy, com.nexi.andrea
Andrea, Andy, sph.SiliconBonk
Andrea, Andy, sph.FatToni
Andrea, Andy, net.sadman.presettoni
Andrea, Andy, net.sadman.splittoni
Meta, Meta, Metadata.ui
Meta, Meta, Keywords.ui
Lens, Lens, Advanced/LensCorrection.ui
Lens, Lens, tin.tin.zPerspector
Post, Post, com.kbarni.vigne
Post, Post, net.sadman.typewriter
Post, Post, tin.tin.zFrame
Post, Post, tin.tin.zShadow
Post, Post, net.sadman.texa
Xtra, Xtra, Histogram.ui
Xtra, Xtra, MirrorInvert.ui

Now lets have a look at some entries to explain the concept:
Standard, Std, Presets.ui
This line instructs Bibble to put the Presets tool (identified by the Presets.ui file) into the "Standard" or "Std" tab.
Color, C, Advanced/ColorManagement.ui
Here the Color Management tool is put into the "Color" or "C" tab.
The second tab name in these specifications is the one that is used when you select small fonts in the preferences.

And finally here an example for a plug-in:
S+N, SN, sph.waveletsharpen
This puts Wavelet Sharpen which is identified by the internal plug-in identifier into the S+N tab (I like to keep sharpen and noise tools all in one tab).

So how to you know the name of the UI files that Bibble uses?
Have a look in the Bibble install directory. In there under supportfiles/tools you will find the UI files for all the tools that Bibble supports directly. You will actually find more files in there than are useful for this customization as the UI files for the popup windows (like layers and crop) are also located here. But with a bit of experimentation (or by copying the file shown in this blog post as a starting point) you should be up and running pretty quickly.

The names of the plug-ins that are to be used here can be found in the Info.bxml files in each of the plug-in directories.
So the above name for Wavelet Sharpen comes from the file Plugins/Wavelet Sharpen2.bplugin/Info.bpxml which contains the statement identifier="sph.waveletsharpen".
Andreas pointed out an easier method to find the plug-in identifiers, they are also listed in the bibbledebug.txt file in your Bibble user folder.

Bibble needs to be restarted to pick up changes in the customToolsUI.txt file. You might want to have a close look at the bibbledebug.txt file while working on the customTools.ui file. Errors will show up there.
Note, you can not list a UI file twice, so if you want to have the Curves Tool on multiple tabs, you still need to pin it. Or you could create/link UI files under a different name and then use them twice.

EDIT: There is some further discussion on UI customization in the following thread in the Bibble forums: http://support.bibblelabs.com/forums/viewtopic.php?f=62&t=19388

Wednesday, April 13, 2011

Using Plugins and Presets in Bibble 5: Framing and Matting

There are a lot of cool plugins for Bibble 5 available now, but we get a fair number of questions about how to use them, get them, and what they are for. So, I'm going to walk - slowly - through a couple of my new favorites here.

The plugins I'm going to be dealing with are zFrame and zShadow. These are used to add frames and shadows around your images. AND, they can be used together to add BOTH frames and shadows. This is a great way to simply and quickly add a finishing touch to your photos.


But, the really cool part of this is that you can use these plugins through Presets. This will make the addition of your favorite frame/shadow styles quickly and repeatably.

So, let's get started...

Step 1: get the plugins.
Both these plugins are in our plugin catalog, so let's first get zFrame. Follow this link to go to the details of the zFrame plugin, then click the "Learn more and download" link, which will take you to our forums to a post that is always kept up to date with the latest version of this plugin. Click the link to the newest version (which is currently here). Now, in that message, you'll see an attachment on that post called "zFrame2_2.1.1_WML.bzplug".

Here's a close-up of the controls these plugins offer

Clicking on that attachment will start downloading it. Now, on most systems, your browser will ask if you want to save the plugin, or if you want to open it will Bibble 5. Opening in Bibble 5 is easier, but if you don't have that option, then just save it to your desktop, then run Bibble 5 and go to File -> Install Plugin... and select the zFrame plugin to install it.

Once that plugin is installed, it will ask if you want to restart now to finish installing that plugin, or if you want to restart later. Since we've got one more plugin to install, choose 'Later'.

The process for zShadow will be very similar to the process above. Start with this link to the plugin catalog entry for zShadow, then follow the "More info" link, and the link to the latest version. Download, or install it directly, just like we did for zFrame.

When you're done installing zShadow, restart Bibble 5 to see them appear in the right-side toolbar. They might not both be on the same tab, like you see on the screenshot above (that was taken from a development version of Bibble 5 that's not released yet).


Step 2: Using zFrame
zFrame allows you to add 1 to 5 frames around your photos, in any color and size. The frame size is based on the size of the photo you're working on, so settings can be copy & pasted from images with or without crops, or images from different cameras and will look consistent across all those.

The x/y ratio control allows you to make a frame wider than it is tall (or the other way around, of course).

The x-pos and y-pos move the image in the frame left or right (x-pos) and up or down (y-pos). Pretty self-explanatory. So, let's look at a few examples:

Starting with a simple, single frame with a color chosen from within the image:


Or, we can have multiple frames of various thickness and color, shown below.  This is a very simple but effective framing style that works on a wide range of photos. The settings are pretty simple: Frame 1 (the closest to the photo) is size 1, and black, Frame 2 is size 5 and white, and Frame 3 is just like Frame 1. It's kind of hard to see Frame 3 in the preview window in Bibble; it's a lot more visible on websites or in email where backgrounds are typically white.


And, here's a simple "polaroid" style frame, with these settings:
Frames 1 and 3: Size 0.3, black
Frame 2: Size 5, x/y ratio -65, y-pos -65


Step 3: Using zShadow
zShadow is similar to zFrame, but it adds a drop-shadow around the image, along with a single frame. Here's a simple example, using all the default settings (just enabling the plugin):


One interesting effect you can do with zShadow. This is done with Shift set to zero (so the shadow isn't offset in any direction), and with a large edge (think of this a softness or blur radius) and large Scale (or size). The settings are visible if you click on the thumbnail below. This affect is a little over-done in this example compared to settings I'd actually use on my photos, to make it more visible. This is basically an "outer glow layer effect" in photoshop parlance.


Step 4: Using zFrame and zShadow together
Here's where things get cool: using both these plugins together to add frames and a shadow within those frames.


In this first example, I simply just re-enabled zFrame, using the last settings from my "polaroid" example above. You can see the outer glow shadow is applied outside the last of the frames that make up my polaroid - but one cool feature of these plugins is that you can pick frames other that the outside frame to put the shadow around. So, let's look at that:


Here, I've added a Frame 5 with the same color as the background in the photo, and I've set, it zFrame, to put the shadow between Frame 4 and Frame 5. Again, click the thumbnail below to see the settings in both plugins for this. Very cool stuff!


Step 5: Making Presets
OK - now I'm going to make a couple of Presets for frames and shadows. For these, I'm only going to use white and black frames, instead of colored frames because I want to use these Presets on a wide range of photo content.

So, let's get started. First, I'm going to make a Preset from my second frame example from above: two small black borders around a wider white frame. First, setup the image with the frame you want to save as a preset. Then, click the "Plus" button on the Presets tool. In the screenshots above, you can see that I've "rolled up" the Presets tool (by clicking the arrow on the left of the Presets tool), and I've "pinned" it (by clicking the thumbtack on the right of the Presets Tool) so that it appears on top of all the tool tabs.

When you first click the Add Preset button (the plus sign), it'll pop up with lots of settings checked, or partially checked:


I only want the zFrame and zShadow settings in this Preset, so click 'None' at the bottom of the Save Settings window to uncheck all settings, then click twice in each of the boxes next to zFrame2Plug and zShadowPlug. This will select all the values for both plugins - not just the settings that are different from the defaults. This is important - we don't have a shadow set here, but I did choose to include zShadow in this Preset. This will ensure that, when I apply this Preset to any image, even one with a shadow already applied, the end-result will be no shadow and a frame like I've shown. Nice, predictable results. Give the Plugin a name, I'll call it Simple Frame, and click OK:


Now, I'm going to add a shadow to this simple frame, and then shift the framed image up and to the left a bit in order to center the whole image in the frames. The settings for this are visible in the full-size image, linked from the thumbnail, below. You can also see the Save Settings window, again with nothing but zShadow and zFrame checked.


Step 6: Making a Custom Output Batch
Now, let's do one final step: create a batch, and include this last Preset in it. With this batch, all images processed with in will be framed, including the shadow, and resized according to the settings we choose, appropriate for posting on a photo sharing website.

First, click the 'Output' tab to open it up (if it wasn't already visible. Now, right click anywhere inside the 'Batch Output' tool, and select 'New...' from the context menu that appears. A Batch Output Settings window appears like the one below.


I've edited the following:

Batch Name - name it something descriptive, that you'll remember
JPEG Quality - I've bumped this up to 90%, looks better but is still a reasonable file size
Image Sizing - set width and heigh both to 800. That means the larger of the width or height - including the frame and shadows - will be exactly 800 pixels.
Additional Image Setting -> Apply Presets - Here, I clicked the plus icon to select my Simple Frame and Shadow Preset that I created a moment ago.
Output Color Space - sRGB
Metadata - I checked all the options in here.

I left several other bits as their default settings:
Destination - 'Ask' and left 'only prompt once' disabled. This means that each time I send one or more images to this batch, Bibble will be nice enough to ask me where I want the resulting images to be saved to. When I next send images to that same batch - it'll ask again.

OK - that's it! Click 'OK' to save it.

Now, using that Batch is simple. I pressed F8 to switch from Single Image view to Thumbnail View, where you can see a bunch of images, filtered to only show the 1 Star images or better. Press CTRL+A to select them all, then drag to the Web Sized and Framed batch; Bibble will ask where you want to save these images, and I created a new folder on my desktop for them.


All the images will come out, freshly framed and shadowed, with the same final image size of exactly 800 pixels on the longer edge. It doesn't matter if any individual images in that set had zFrame or zShadow settings - those image-specific settings were replaced by the settings I applied with the Simple Frame with Shadow Preset. You can see those final photos in the gallery here:

Images from Downtown Austin


Hope this was a bit useful...

Tuesday, March 29, 2011

Bibble Survival Guide


Earlier this year, two long-time Bibble experts published the first really detailed ebook focused on optimizing your digital workflow with Bibble 5. Andreas F. X. Siegert and Marco Frissen have been using Bibble for years and years, and are both quite accomplished photographers, authors and educators. You can see a sample of Andreas' work here, and Marco's here, but here are a coupe of my favorites:

"Gas station at dusk" by Andreas F.X. Siegert


"At the Bar" by Marco Frisen

But, enough about that, let's take a look inside the Bibble Survival Guide.

The BSG, as it's called, starts out with a brief history of Bibble Labs and an intro into RAW processing and non-destructive editing. From there, Marco and Andreas quickly jump into their Setup Workflow. This is their recommendation on how to get Bibble downloaded, installed, running, and how to familiarize yourself with the Bibble 5 interface.

Each of the various sections in the Setup process contains links to other sections in the BSG that discuss, in detail, the bits mentioned in the Setup. That's one of the great things about this book - it's a PDF and is simply full of links to other related content in the BSG. So you don't have to read it front-to-back, just click around through the bits that are relevant to your level of knowledge of Bibble 5. Also, since it's a PDF, you can search the BSG for specific items of interest - a whole lot easier that flipping through a printed book. But, of course, you can print it yourself if you do want a paper copy (it's over 200 pages, though).

The section on Color Management deserves a special mention here. It not only provides a great introduction to what Color Management actually means, detailing how camera profiles, working spaces, and output profile conversions all work together to ensure your images look great and that the color is accurately reproduced on the web, in prints, and anywhere else you use your images. It also provides recommendations on working spaces and how to setup Bibble 5 for optimal color quality.  Color management can be pretty complicated stuff, but Andreas and Marco break it down into practical, real-world terms that any any photographer can quickly grasp. And, since this guide is all about Bibble 5, they provide step-by-step help for ensuring your settings in Bibble 5 are spot on.


Chapter 4 is all about the image adjustment tools built into Bibble 5. It's a little over 40 pages long, and walks your through each of the various tools in Bibble, what they do, and how to use them. But, this isn't just the simple list of tools that you'll find in the Bibble 5 Users Guide; rather, Andreas and Marco group the various controls into groups and discuss them together. Starting with White Balance, Exposure and tonality controls, and continuing through color correction, compositional changes using cropping and rotation, noise control and sharpening, etc. In this section, they also walk you through, step-by-step, Bibble 5's selective editing tools, including heal & cloning. They provide lots of real-world examples and guide you through Bibble 5's interface with their own images, so you can see exactly how they go from the original images to print-ready photos.

Chapter 8 and Chapter 9 might be the most valuable sections for those that already are somewhat familiar with Bibble 5, but really want to get the most from it. Chapter 8 is all about plugins - where to find them, what they do, how to use them, including, of course, lots of sample images with before/after comparisons. It goes through 12 of the most popular plugins for Bibble 5 in detail.

Chapter 9 - titled "How To" - does just that: it shows you How To put all you've learned in the first chapters of the book to use, on real-world images. It shows you not only how to correct lots of common photographic problems (bottom left is the "Hazy Day" example) but also how to use Bibble's tools for creative interpretation of your photos, including 5 pages on black & white conversions using several different methods and plugins. There's another section on skin tones and retouching, shown bottom right, using selective adjustments to selectively soften skin.


There's obviously a lot more to this ebook that I can discuss here. You can get a sample of the ebook here, see the complete table of contents, and learn more about Marco and Andreas.

Monday, December 20, 2010

Bibble 5.2 Release Candidate and Holiday Discounts

This has been a pretty amazing year. We launched Bibble 5.0 almost exactly one year ago, added Perfectly Clear and Heal & Clone in version 5.1 in June, and are on the verge of releasing 5.2 with a whole host of new features and improvements. We've added no fewer than 60 RAW file formats since 5.0 launched, most of these in smaller releases between the "big" 5.x releases, and built and released our Bibble 5 RAW SDK to our technology partners.

So, with that said, I just wanted to quickly draw your attention to our release announcement for our Bibble 5.2 Release Candidate. This is probably the biggest update we've had since launching Bibble 5, and along with it we're offering a discount on both Bibble 5 Pro and Bibble 5 Lite.

After you take advantage of the discount vouchers, you can choose to download the "official" version of Bibble 5, which is 5.1.1, or you can decide to get the release candidate of 5.2. Your choice, and you can change your mind at any time.

Monday, November 22, 2010

Looking Forward to Bibble 5.2 - Part 2

Hi Guys,

Continuing from my earlier post, here's another set of features and updates we're working on for Bibble 5.2.

Copy Sets

Copy Sets can be a huge time-saver once you've figured out how to use them. The idea is to assign a hotkey, perhaps something like CTRL+1, to a group of settings, perhaps like Keywords, Ratings, Labels, and Tags. Then each time you press CTRL+1, the keywords, ratings, etc from the selected image will be copied to the clipboard. CTRL+V then pastes that to all selected images. In other words, you pre-select the stuff you want to copy frequently using a interface like the Selective Copy window, and save that to hotkeys. You can have lots of these, too, and that's where real workflow automation comes in by creating various Copy Sets for things like color correction, tonal control and other image adjustments, then other Copy Sets for various metadata options like copyright and photographer's contact info, or GPS info.

Monday, November 1, 2010

Looking Forward to Bibble 5.2

Hi Guys,

It's been a little while since our last post here, mainly because we've been hard at work on Bibble 5.2 and want to keep focused on that. But, I'd like to take a moment and share some of the exciting stuff we've been building into 5.2 just to get ya'll, well, excited.


Respect the Transform!
The one thing in previous versions of Bibble 5 that was editing-order dependent was creating regions: the "proper" way to work would be to straighten your horizon first (if needed) and THEN create regions to selective adjust image content. If you did things in the other order - regions first, then rotated the whole image a few degrees, well, the region would not rotate with the image content. Trouble! So, we've fixed that, and in the process allowed plugin developers to transform images all they want, and your regions will come along for the ride. The obvious example here is zPerspector which allows you to correct perspective distortion, remove keystoning and other geometric adjustments, with Bibble 5.2 and the up-coming new version of zPerspector, your regions will be transformed right along with your image content!


There are other enhancements to the Bibble Plugin SDK for version 5.2 that will allow our plugin developer community even more power and control when creating plugins. Some of them have had access to early Bibble 5.2 beta builds for several weeks, along with the new SDK. I expect some interesting stuff from them.


Crop Preferences
This sounds like a small thing, but it can really help out and allows you to not only create and manage cropping presets, but it also lets you configure various bits and pieces about how the crop tool looks and acts. You can control the opacity of the background of the crop tool, set how many grid lines to show inside the crop tool, and you can choose when to show the grid and crop frame: always, never, or only when moving or adjusting the crop.


There's also a lot of other features and updates aimed at improving usability and making the overall process of working with Bibble 5 easier and more fun. I'll go into a bit about these other bits and pieces in a future post...

Photo courtesy of Texas Photo Workshops

Also, just a quick update that the next Online Texas Photo Workshop on Bibble 5 is starting in one week. Sign up while space is still available.

Thursday, September 2, 2010

Bibble 5.1.1 Update Released

We're happy to announce that Bibble 5.1.1 is now available. This release is primarily a camera support update to add support for the new cameras announced by Sony - the A33, A55 and A560. Also included is lens detection support for Sony and Panasonic cameras. Here are the finer details:
  • Added support for Sony a33, a55, a55V, a560.
  • Added support for Panasonic FZ40, FZ45, FZ100.
  • Added preliminary support for Canon 60D.
  • Added support for lens detection on Sony and Panasonic RAW files.
  • Fix issue causing crash when printing images with certain plugins applied.
Here at the labs we're committed to being among the first RAW converters to offer support for new cameras. If you've got a new toy we want you to be able to play with it right away. ;-)

Cheers

Tuesday, August 24, 2010

BIBBLE BASICS Workshop

Hi Folks,

Well, I'm happy to announce that Kevin Vandivier and Jeff Cicolani and just opened the doors to the BIBBLE BASICS workshop.

Jeff Cicolani spent quite a bit of time over here at the Labs, getting to know the ins and outs of Bibble 5 even better than he knew it before. It was really interesting for me to work with Kevin and Jeff in getting this put together, and I'm really excited about this new learning option for our customers.


Photo by Jeff Cicolano


This first workshop is designed to get you up and running with Bibble 5 quickly, making sure you are proficient at using the basics of Bibble 5. It a four-week, online workshop, meaning that anyone anywhere in the world can join in. An in-person version is planning as well, but that might still be a few months away. (Let us know in the comments if you'd be interested in an in-person workshop)

Monday, August 9, 2010

Bibble Training @ Texas Photo Workshops


As Bibble has grown in popularity over the years, we've had more and more customers wanting more and different learning options about our products. When Bibble 5 launched, we started out with a small set of tutorial videos, the on-line and PDF User Manual, FAQ's and of course our forums. But we've never had in-person training classes or dedicated, online workshops that will walk new users through the details of a photographic workflow using Bibble. Until now...

This summer, we've been working closely with the good folks at Texas Photo Workshops to put a workshop series together - and we're getting very close to launching it! Kevin Vandivier created the Texas Photo Workshops in 2008, after his time as the Photography Editor at Texas Highways Magazine (where he received numerous awards, including Honorable Mention for “Photo Editor of the Year” in the coveted Best of Photojournalism competition for 2009). For over 30 years, Kevin has traveled extensively throughout the U.S. and the world, covering assignments for Life, Newsweek, USA Today, National Geographic World & Adventure, Texas Monthly, Texas Highways and numerous other publications. His current workshops include his wildly popular Photographers Rehab, Masters of Light, and many others taught by Kevin and his partners. Here's how Kevin describes TPW:

Texas Photo Workshop was founded in 2008 by award winning photographer and photo editor Kevin Vandivier. TPW teaches excellence in photography by hiring A‐List photographers who have a proven track record as professional, award-winning photographers to teach our photography workshops. Both the online and in‐person workshops will advance your learning process by months, if not years. See what we offer at www.texasphotoworkshops.com.


We'll be starting out with a beginners workshop on the basics of a photographic workflow built around Bibble. Kevin and his team have put a huge amount of work into this first program, and I'm thrilled by the quality and quantity of information, and the easy, approachable style of his workshops. More details will follow about this as we get a bit closer to launch.


Here are a few of my favorite photos by Kevin:


Thursday, June 17, 2010

Sync Plugins and Presets across Multiple Computers

Here's a very useful trick that I've just started using. The idea is to use Dropbox to make sure plugins that you install on one computer auto-magically get installed on all machines that you use for Bibble.

First, a bit of background: Dropbox allows you to sync files and folders across several machines by storing a copy of items you want to sync in "the cloud". So, by sharing your "Plugins" and "Presets" folders on all the machines you use to run Bibble, you can be sure that they all look, feel, and perform the same. Install a plugin on any machine that you have setup to sync, and all other computers will get that plugin too! (note that you might need to restart Bibble on the other computers to get the new plugins to show up.)

This works on all systems that Dropbox supports, but requires NTFS on Windows.

Here's how:

Friday, May 21, 2010

Heal & Clone Teaser Video

Here's a quick look at what will be my starting point for our next official tutorial video for Bibble 5. It shows Bibble 5.1's new Heal & Clone tools in several different forms. Heal small specs to quickly remove dust or a wayward bird in the sky, clone out distracting elements, sensor dust, unwanted people from your images, and more. Take a quick look:


This is a bit longer that the final video, and there's no audio yet. Just a quick peek at what's to come regarding Healing & Cloning in Bibble 5.

Friday, May 14, 2010

Speed up the Human: Keyboard Layout

If you are using a more or less current computer chances are pretty high that Bibble is waiting for you most of the time and not the other way round. While one could drink unhealthy amounts of coffee or your favorite Austrian energy drink to speed up yourself, this might not the best idea on the long run.

In computer games you might collect power-ups, potions, health-packs or build your abilities along the way to become stronger-faster-better.

In Bibble we can assign keyboard shortcuts to almost anything. So without further ado i'll show you my current keyboard layout without any actual keys because the idea matters, not the actual assignment, even more so with all the different international keyboards we all are using and accustomed to.


How I arrived there and why it is set up this way. ...after the jump...

For those more comfortable with German might want to read this on my blog.

Tuesday, May 11, 2010

Come See Bibble 5.1 at the Austin Photo Expo

Austin Photo Expo

Come see Bibble 5.1 in action at Austin Photo Expo this weekend in our home town, Austin, Tx. We'll be having live demonstrations of the newest features in Bibble 5, including Perfectly Clear, and Healing and Cloning as well as general workflow demonstrations with Bibble 5.

I'm be hosting a few seminars on both Saturday and Sunday, and will be available for Q&A's both in our booth and in the seminars.

There will be tons of other great speakers there, and there's likely to be some great show specials as well, so come on down for the free show!

Wednesday, April 21, 2010

Bibble 5 Box Art

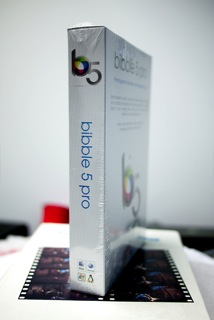
As mentioned earlier on our Twitter feed, today we got our hands on the first Bibble 5 boxes to be printed. Here are a few pictures of the new boxes. They’re more compact and have a much cleaner design than the Bibble 4 boxes did and I think they really turned out great.

2010-04-21_20-23-19.jpg 2010-04-21_20-23-52.jpg
2010-04-21_20-26-39.jpg
2010-04-21_20-27-29.jpg

I’ve uploaded larger versions to my Flickr stream.

Cheers

Friday, April 9, 2010

Perfectly Clear Teaser

We've been hard at work on version 5.1, and one of the headline features we're going to be including in this (free) update is Perfectly Clear - the one-touch image optimization tool from our friends at Athentech. They have a great page explaining the image science behind their unique correction algorithms, so instead of going into that, let's just take a look at some before/after examples using Perfectly Clear inside Bibble in our latest development version of Bibble 5.1 Pro.

For all these shots, the only difference in the left (Bibble Default) images and the right (Perfectly Clear) is that for the image on the right, the Perfectly Clear adjustment was turned on - literally a single mouse click!

This first shot is a typical example of the results you can get out of Perfectly Clear in Bibble 5.1 with just one click. There is so much additional detail in the stones on the right of the doorway, and such an additional sense of depth to the scene.


Monday, April 5, 2010

New Plugin Directory

This weekend, we updated bits and pieces of our webpages, and added a new and much-needed Plugin Directory.

The directory (part of which is shown to the right) allows you to find the amazing work being done by the folks out there, creating cool new image adjustment tools for Bibble 5.

The directory allows you to sort by popularity, recent updates or with the newest plugins shown first. It also categorized the plugins to help you find the kinds of image adjustments you are looking for, and allows you to quickly see all the plugins created by a particular developer.

A major update to our plugin framework will be released with Bibble 5.1 which will allow for even more powerful and innovative plugins for Bibble 5 - so stay tuned as we get closer to the release of 5.1 for more info on these new plugins.

Monday, March 22, 2010

Cloning Teaser

Here's a quick teaser for one of the features coming in Bibble 5.1 - Cloning. We probably won't be answering any questions just yet and the UI may change. So for now just enjoy the eye candy.

Cloning Screenshot

And here's the end result:

Joshclops

Enjoy!

Plugin developer spotlight: Roger Barnes

This is the first of a (hopefully long) series of short interviews with Bibble Plugin developers. We will start with Roger Barnes (Mind Socket on the Bibble forums). His website can be found here.


Friday, March 19, 2010

Pixie, the antidote for pixel dust.

When I got my D300, the higher sensitivity (compared to the D200) was really nice for available light work and concert shots. But when I started pixel peeping, I quickly realized the noise characteristics for the new CMOS sensor led to fine pixel dust which is hard to get rid of with Noise Ninja. If I used enough noise reduction to get rid of the pixel dust, the image became pretty mushy.
So my choice was either to live with the pixel dust or forgo details in the image.

Thanks to Pixie, a free plugin from Barna Keresztes (http://www.kbarni.net) I no longer have to make that choice. I can have a reasonable amount of noise reduction and can get rid of the pixel dust on top.

In the example below, the left image has neither NN nor Pixie applied, the one in the middle shows NN (NN registered with a slight increase in the chroma noise reduction) and the one on the right NN plus Pixie. The difference might not be earth shattering, but it leads to much nicer prints.

100% view (click for a larger version):
200% view (click for a larger version):

Note, when working with Pixie, smaller adjustments will lead to a more aggressive noise removal.